
Google App Engine applications are easy to create, easy to maintain, and easy to scale as your traffic and data storage needs change. With App Engine, there are no servers to maintain. You simply upload your application and it’s ready to go.
App Engine applications automatically scale based on incoming traffic. load balancing, microservices, authorization, SQL and NoSQL databases, Memcache, traffic splitting, logging, search, versioning, roll out and roll backs, and security scanning are all supported natively and are highly customizable.
This tutorial uses the sample code from the Google Cloud Node.js Getting Started guide
- You will learn how to to connect to computing resources hosted on Google Cloud Platform via the web. You will learn how to use Cloud Shell and the Cloud SDK gcloud command.
First login and sign in to the Google Cloud Console. You will something like this with every detail for your project. (Create one if you haven’t created earlier).

Activate Cloud Shell
Cloud Shell is a virtual machine that is loaded with development tools. It offers a persistent 5GB home directory and runs on the Google Cloud. Cloud Shell provides command-line access to your Google Cloud resources.
In the Cloud Console, in the top right toolbar, click the Activate Cloud Shell button

Click Continue.
It takes a few moments to provision and connect to the environment. When you are connected, you are already authenticated,
gcloud is the command-line tool for Google Cloud. It comes pre-installed on Cloud Shell and supports tab-completion.
You can list the active account name with this command:
gcloud auth list
Enable the App Engine Admin API
Click Left Navigation and Select APIs & services from the drop down and click on Dashboard:
Click on Enable APIs and services:
Then, search for App Engine in the search box.
Click on App Engine Admin API, then click Enable if the API isn’t enabled already.
After Cloud Shell launches, you can use the command line to clone the example source code in the home directory:
git clone https://github.com/GoogleCloudPlatform/nodejs-docs-samples.git && cd nodejs-docs-samples/appengine/hello-world/flexibleNow, install the dependencies with npm:
npm installRun the Application Locally
npm startOnce the application started, click on the Web Preview icon in the Cloud Shell toolbar and choose preview on port 8080. A tab in your browser opens and connects to the server you just started.


Deploying the Application into App Engine
App Engine uses a file called app.yaml to describe an application’s deployment configuration. If this file is not present, App Engine will try to guess the deployment configuration. However, it is a good idea to provide this file.
Open app.yaml to see what it contains. You can use vim, nano, or emacs to view the file: app.yaml
runtime: nodejs
env: flex
This is the basic configuration needed to deploy a Node.js application. You can learn more about configuring App Engine here .
Close the file without making any modifications.
To deploy your application into App Engine environment, run:
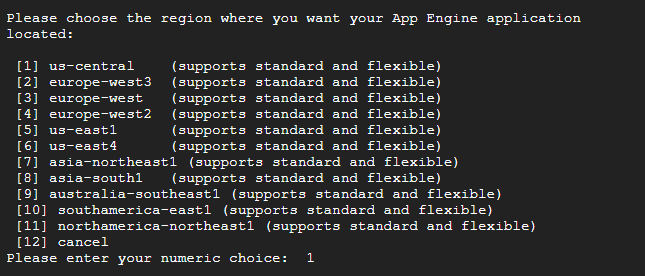
gcloud app deployBecause this is the first time you are deploying App Engine, the tool will prompt you to select a location to deploy the app. For this lab choose us-central.
When prompted, enter y to confirm deployment.
The first-time deployment may take several minutes. This is because App Engine Flexible environment automatically provisions a Google Compute Engine virtual machine for us behind the scenes, and then installs and starts the application.
After the application deploys, you can visit it by opening the URL http://<project-id>.appspot.com in your web browser. The project-id is the GCP Project ID in the CONNECTION DETAILS section of the lab. Alternatively, we can enter the following command for the URL link:gcloud app browse
Now we have set up a simple Node.js application and ran and deployed your application on App Engine.

Update the Application
Install the uuid package with npm:
npm install uuid@^3.1 --saveNow modify app.js to use uuid. You can use vim, nano,or emacs to edit the file:
Enter the following in the Cloud Shell Command-Line to update the app.js file:
nano app.jsImport the uuid module in app.js file:
const uuid = require('uuid/v4');Update the following in app.js file:
'use strict';

// [START gae_flex_quickstart]
const express = require('express');
const uuid = require('uuid/v4');

const app = express();

app.get('/', (req, res) => {
  res
    .status(200)
    .send(`Hello, ${uuid()}!`)
    .end();
});

// Start the server
const PORT = process.env.PORT || 8080;
app.listen(PORT, () => {
  console.log(`App listening on port ${PORT}`);
  console.log('Press Ctrl+C to quit.');
});
// [END gae_flex_quickstart]
Now, you can test the application locally.
Start the Node.js application with npm:
npm startOnce the application started, click on the Web Preview icon
in the Cloud Shell toolbar and choose preview on port 8080. This will for testing only.

A tab in your browser opens and connects to the server you just started. You should see the new app that displays a UUID! every time with new visits.
To deploy your updated application, run:
gcloud app deployIn a few minutes, the new version will be deployed and you can visit it by opening the URL http://<project-id>.appspot.com in your web browser. Alternatively, you enter the following command for the URL link: gcloud app browse.
More Info on: https://google.qwiklabs.com/