

Kubernetes is an open source project (available on kubernetes.io) which can run on many different environments, from laptops to high-availability multi-node clusters, from public clouds to on-premise deployments, from virtual machines to bare metal.
Using a managed environment such as Kubernetes Engine allows you to focus on experiencing Kubernetes rather than setting up the underlying infrastructure.
Activate Cloud Shell
Cloud Shell is a virtual machine that is loaded with development tools. It offers a persistent 5GB home directory and runs on the Google Cloud. Cloud Shell provides command-line access to your Google Cloud resources.
In the Cloud Console, in the top right toolbar, click the Activate Cloud Shell button. It takes a few moments to provision and connects to the environment. When you are connected, you are already authenticated, and the project is set to your PROJECT_ID.

Google Kubernetes Engine
In the cloud shell environment type the following command to set the zone:
gcloud config set compute/zone us-central1-bAfter you set the zone, start up a cluster for use in this lab:
gcloud container clusters create ioNote: It will take a while to create a cluster - Kubernetes Engine is provisioning a few Virtual Machines behind the scenes for you to play with!
Get the sample code
Clone the GitHub repository from the Cloud Shell command line:
git clone https://github.com/googlecodelabs/orchestrate-with-kubernetes.gitcd orchestrate-with-kubernetes/kubernetesList the files to see what you’re working with:
lsThe sample has the following layout:
deployments/  /* Deployment manifests */
  ...
nginx/        /* nginx config files */
  ...
pods/         /* Pod manifests */
  ...
services/     /* Services manifests */
  ...
tls/          /* TLS certificates */
  ...
cleanup.sh    /* Cleanup script */
Now that you have the code — it’s time to give Kubernetes a try!
Quick Kubernetes Demo
The easiest way to get started with Kubernetes is to use the kubectl create command. Use it to launch a single instance of the nginx container:
kubectl create deployment nginx --image=nginx:1.10.0Kubernetes has created a deployment — more about deployments later, but for now all you need to know is that deployments keep the pods up and running even when the nodes they run on fail.
In Kubernetes, all containers run in a pod. Use the kubectl get pods command to view the running nginx container:
kubectl get podsOnce the nginx container is running you can expose it outside of Kubernetes using the kubectl expose command:
kubectl expose deployment nginx --port 80 --type LoadBalancerSo what just happened? Behind the scenes Kubernetes created an external Load Balancer with a public IP address attached to it. Any client who hits that public IP address will be routed to the pods behind the service. In this case that would be the nginx pod.
List our services now using the kubectl get services command:
kubectl get servicesNote: It may take a few seconds before the ExternalIP field is populated for your service. This is normal — just re-run the kubectl get services command every few seconds until the field populates.
Add the External IP to this command to hit the Nginx container remotely:
curl http://<External IP>:80And there you go! Kubernetes supports an easy to use workflow out of the box using the kubectl run and expose commands.
Pods
At the core of Kubernetes is the Pod.
Pods represent and hold a collection of one or more containers. Generally, if you have multiple containers with a hard dependency on each other, you package the containers inside a single pod.
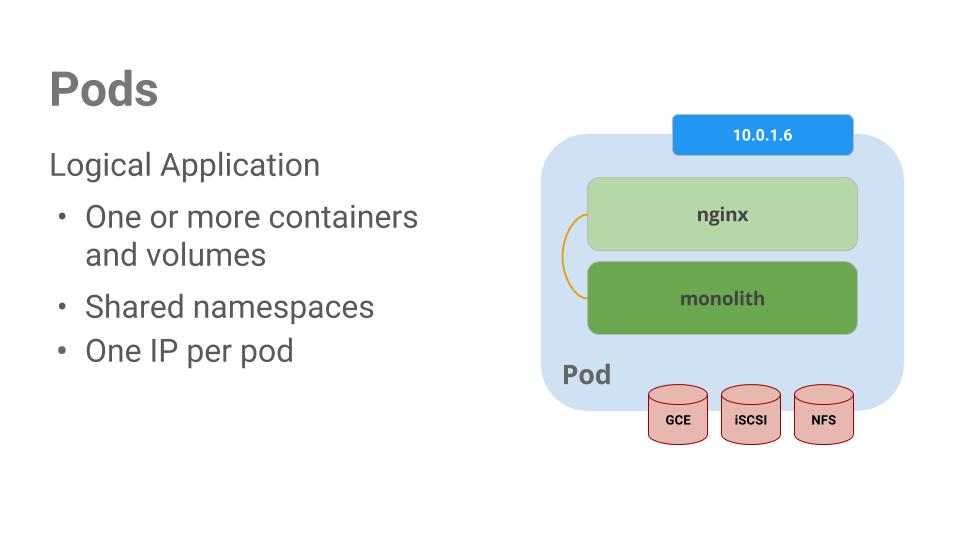
Pods also have Volumes. Volumes are data disks that live as long as the pods live, and can be used by the containers in that pod. Pods provide a shared namespace for their contents which means that the two containers inside of our example pod can communicate with each other, and they also share the attached volumes.
Pods also share a network namespace. This means that there is one IP Address per pod.
Services
Pods aren’t meant to be persistent. They can be stopped or started for many reasons – like failed liveness or readiness checks – and this leads to a problem:
What happens if you want to communicate with a set of Pods? When they get restarted they might have a different IP address.
That’s where Services come in. Services provide stable endpoints for Pods.
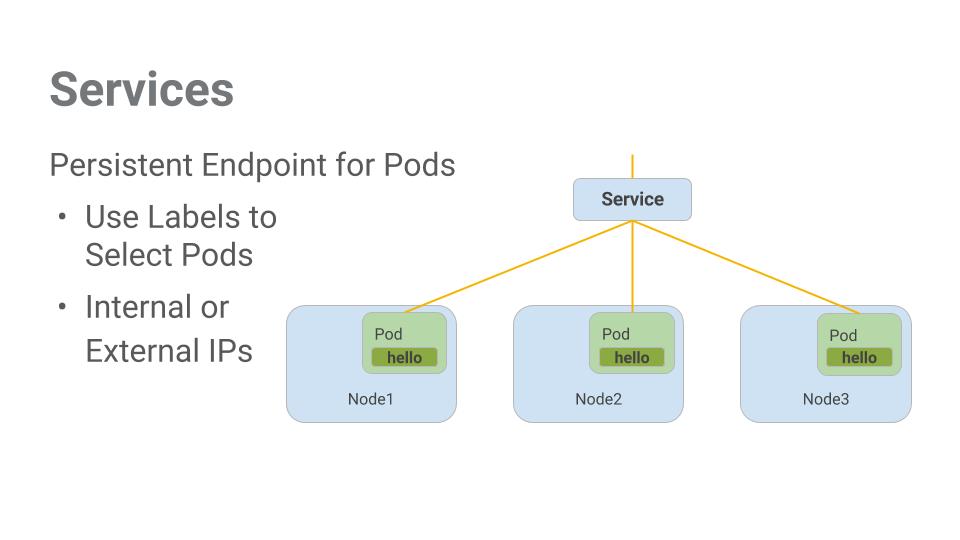
Services use labels to determine what Pods they operate on. If Pods have the correct labels, they are automatically picked up and exposed by our services.
The level of access a service provides to a set of pods depends on the Service’s type. Currently there are three types:
ClusterIP(internal) — the default type means that this Service is only visible inside of the cluster,NodePortgives each node in the cluster an externally accessible IP andLoadBalanceradds a load balancer from the cloud provider which forwards traffic from the service to Nodes within it.
Deploying Applications with Kubernetes
The goal of this session is to get you ready for scaling and managing containers in production. That’s where Deployments come in. Deployments are a declarative way to ensure that the number of Pods running is equal to the desired number of Pods, specified by the user.
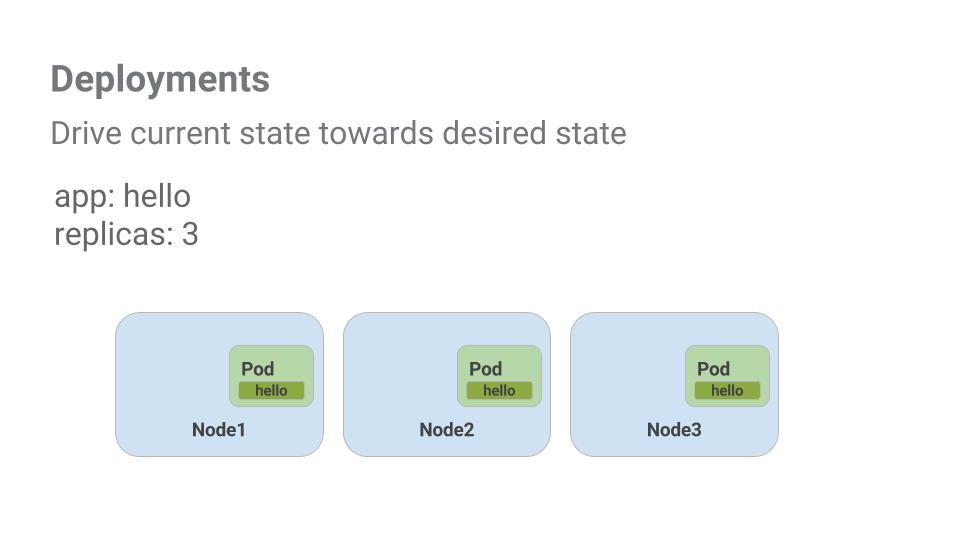
The main benefit of Deployments is in abstracting away the low level details of managing Pods. Behind the scenes Deployments use Replica Sets to manage starting and stopping the Pods. If Pods need to be updated or scaled, the Deployment will handle that. Deployment also handles restarting Pods if they happen to go down for some reason.
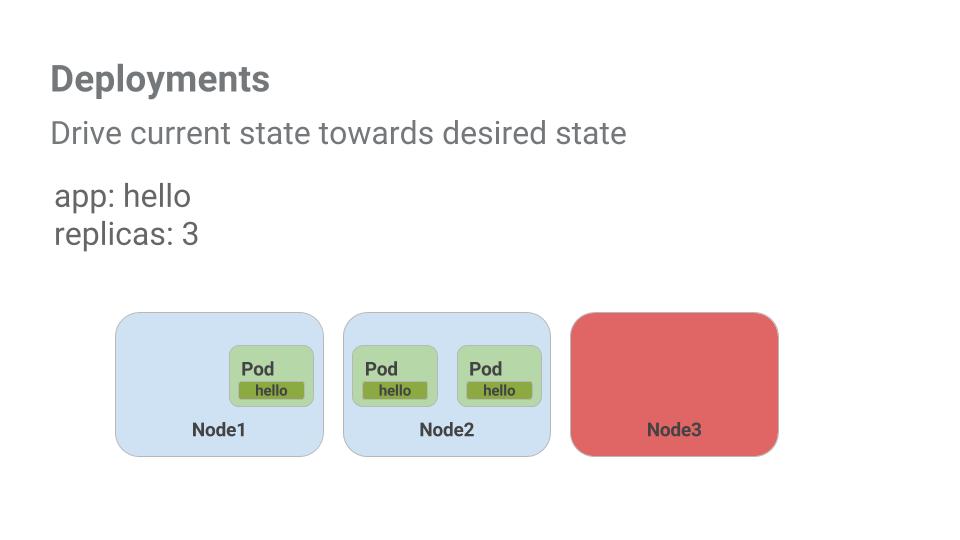
Pods are tied to the lifetime of the Node they are created on. In the example above, Node3 went down (taking a Pod with it). Instead of manually creating a new Pod and finding a Node for it, your Deployment created a new Pod and started it on Node2.
We have developed a multi-service application using Kubernetes. The skills you’ve learned here will allow you to deploy complex applications on Kubernetes using a collection of deployments and services.